Bluetooth mouse app
About project
This project has two parts: a bluetooth server that controls mouse and keyboard inputs, and an android app that sends mouse movement information and keystrokes to the bluetooth server.
My purpose was to make a remote mouse and keyboard for the Raspberry Pi. I wanted to make the mouse user friendly and intuitive.
Server
The server is written in python for the bluez linux bluetooth stack. The server accepts incoming connections and recieves data from the client device. After the client closes the connection, the server is ready to accept another connection.
Mouse and keyboard emulation is handled by xdotool, a linux command line program.
Client
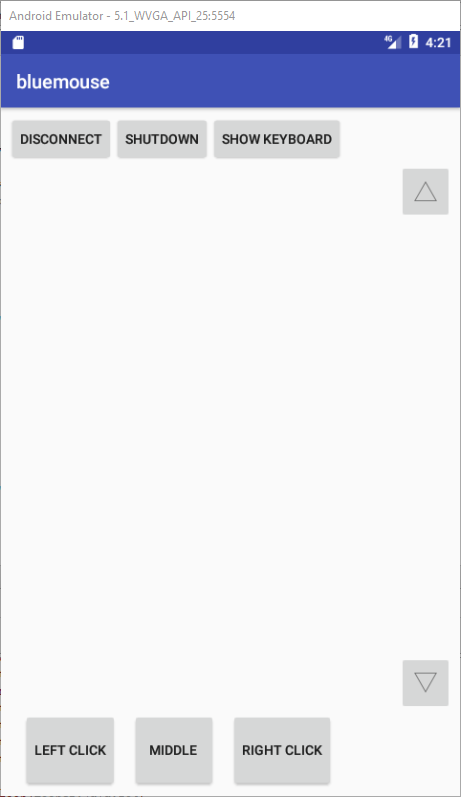
The client is an android application that acts as a touchpad and keyboard.
Bluetooth message structure
The client sends messages to the server in the following format: [code character][data]. The code character specifies what type of data is sent. For example, to send mouse movement data, the client sends the message "mx y" where x and y are the pixel amounts to move the mouse cursor on the server machine. The message that moves the cursor 100 pixels down and 300 pixels to the right is "m300 -100".
Getting mouse data
To get mouse movement data in the android app, we can override the
onTouchEvent action listener. This method is called whenever
the user touches the phone screen. We want to record the distance the user
drags their finger on the screen, so we will need two point variables. One
point will represent the finger's starting postition, the second point will
represent the finger's ending position.
In order to make keeping track of points simple, we should make a Point class (code linked below). In our Point class, we need to be able to access and modify x and y coordinates, and do some basic vector arithmetic. For convenience, we'll want a method that returns a string representation of the point that is ready to send to the server.
Sending mouse data
To send the string messages from the android app, get the
OutputStream from an open BluetoothSocket.
      OutputStream os = serverSocket.getOutputStream();
      String message = "m300 -100";
In order to send the message to the server, we need to write the message to the output stream. First we need to convert the string to a byte array.
os.write(message.getBytes());
Now the message has been sent to the server. The server has to recieve and interpret the message and act accordingly. This loop recieves messages from the connected client continuously:
      while(True):
        data = client_sock.recv(64)
Here, client_sock is the client socket. The recv(64)
method waits until the client sends a message, then reads 64 bytes
from that message. More than 64 bytes can be read if desired, but the
client sends short messages, so in this case a message size limit of 64
bytes should be plenty.
After receiving a message, the server separates the code character from the
data. Since the code character is always only on character, this separation
is easy. All we need to do is store the first character in a variable, and
then remove the first character from data.
      code = data[0]
      data = data[1:]
Now that the code character and the data are separate, we can handle different types of messages from the client.
      if code == "m": #mouse movement
        os.system("xdotool mousemove_relative -- %s" % data)

      elif code == "1": #mouse1
        os.system("xdotool click 1")

      elif code == "2": #mouse2
        os.system("xdotool click 2")

      ...
The data is sent directly to xdotool by using os.system(),
which allows us to execute command line programs from our python code. The
xdotool option we use to move the mouse is mousemove_relative --
. xdotool mousemove_relative x y tells
xdotool to move the cursor x pixels to the right and
y pixels up from the cursor's current position. The
-- allows negative coordinates, such as
xdotool mousemove_relative -- 0 -10, which
moves the cursor 10 pixels down.
To emulate keystrokes, we use xdotool with the key option. For
example, to send the letter "a", use the command
xdotool key a. Emulating letter keys is easy, but emulating special
characters is harder. The command xdotool key ,
would fail and not emulate the "," key. The correct command to emulate a
comma keypress is xdotool key comma. This means
we need to do some additional processing to convert character data to data
that xdotool can understand.
Special characters
We need to convert special characters into strings of letters that xdotool can read. I chose to do this conversion on the client side. This way, the client can be modified to support more special characters while the server is still running.
We can create a class to convert special characters to strings. In my
implementation, I wrote a method that takes a KeyEvent as input
and returns the correct xdotool character name.
      public static String getXDoToolKey(KeyEvent event) {
        int keyCode = event.getKeyCode();

        switch(keyCode) {
          case KeyEvent.KEYCODE_DEL:
            return "BackSpace";

          case KeyEvent.KEYCODE_PERIOD:
            return "period";

          case KeyEvent.KEYCODE_SEMICOLON:
            return "semicolon";

          ...
The KeyEvent class reports key events, and has static integer
fields that represent keys. Writing this conversion method was tedious,
since I could not find a list of all the possible xdotool key names, so I
had to guess and check.
Sending keys
Sending keypresses over bluetooth is very similar to sending mouse movement
data over bluetooth. In the main activity, override the onKeyUp
listener.
      @Override
      public boolean onKeyUp(int keyCode, KeyEvent event) {
        if(keyCode != KeyEvent.KEYCODE_BACK) {
          sendKey(KeyCodeTranslator.getXDoToolKey(event));
        }
        return super.onKeyUp(keyCode, event);
      }

      private void sendKey(String keys) {
        try {
          serverSocket.getOutputStream().write(("p"+keys).getBytes());
        } catch(IOException e) {
          e.printStackTrace();
        }
      }
In the onKeyUp action listener, ignore the back button, since
it isn't part of the keyboard. Then translate the KeyEvent into
a string, then call sendKey, which writes the string to the
socket's output stream. The character code "p" tells the server to emulate a
key press.
Closing the connection
When the user is done using the application, the server should be able to
close the connection, continue running, and accept another connection. In
the server code, the main loop calls the function called
connect_recv_loop() that waits for a connection, then receives
and processes data. When the server receives a disconnect message, the
function connect_recv_loop() returns true. If the server
receives a shutdown message, the function returns false.
      while(connect_recv_loop()):
        print "connection closed"

      print "exiting"
      #end of file
This allows the server to accept a new connection after the current
connection closes. Inside connect_recv_loop(), if the code
character sent from the client is "c", the server closes the open sockets
and returns true.
      ...
      elif code == "c": #close connection
	      close_resources()
	      return True
If the client sends a message with the code character "s",
connect_recv_loop() tells the computer to shut down in 1 second and
returns false, causing main loop to exit, ending the program's execution.
Note that the shutdown feature only works on a machine that is configured to
not require a password for the "sudo shutdown" command. By default, the
raspberry pi doesn't require a password with sudo commands, so the shutdown
feature works just fine on a raspberry pi server.
      elif code == "s": #shutdown
        os.system("sleep 1 && sudo shutdown -h now")
        close_resources()
        return False
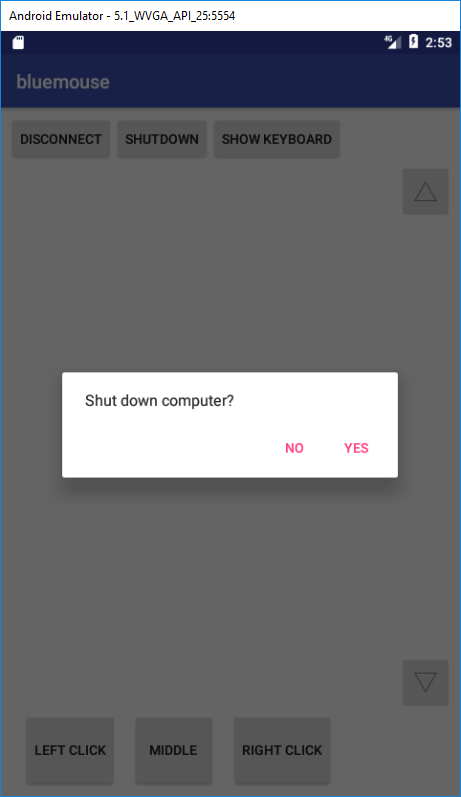
The app sends a disconnect message whenever the user presses the
"disconnect" or back button and when the user exits the app. The shutdown
message is sent when the user presses the "shutdown" button and confirms the
dialog.
Server details
The server runs on the Raspbian operating system on a Raspberry Pi. To make
the server start when the Raspberry Pi starts up, add a desktop
configuration file to ~/.config/autostart - I called my desktop
file bluemouse.desktop. Here are the contents of bluemouse.desktop:
      [Desktop Entry]
      Type=Application
      Name=bluemouse autostart
      Comment=start bluemouse server
      Exec=/home/pi/Desktop/server.py
This only works if both server.py and bluemouse.desktop have executable
permissions, and if the Exec line contains the correct path to
server.py.
Possible improvements
Currently the app connects to a hardcoded device name, "raspberrypi", which is fine if the user only wants to use the mouse for a raspberry pi with the default bluetooth name. A better system would be to ask the user which device to connect to upon opening the app.
Not all special characters can be translated into strings that xdotool
understands. This is because the method that converts KeyCodes
to strings doesn't support all special characters. Adding more conversions
would allow the user to send more types of symbols to the server.
Better scrolling- currently the only scroll buttons are the up and down arrow keys. This makes scrolling very slow, a better solution would be to implement two-finger scrolling like on a laptop touchpad.
Code
Hardware
I ran the server code on the Raspberry Pi Model 3, which comes with bluetooth and wifi, no dongles required.